#Desktop deployment using the Windows Installer XML (WiX) tool
All tasks in this article were conducted on Windows 11 using Visual Studio 2022 (version 17.10.5) and WiX (version 5.1). We will start by installing the necessary dependencies in Visual Studio, then create a C# WinForms application and a C++ application with multiple DLLs. Finally, we will cover how to package our project using WiX and Windows Application Packaging and deploy it on the Microsoft Store.
#Deploying an C# Application using WiX
#Setting up Visual Studio 2022
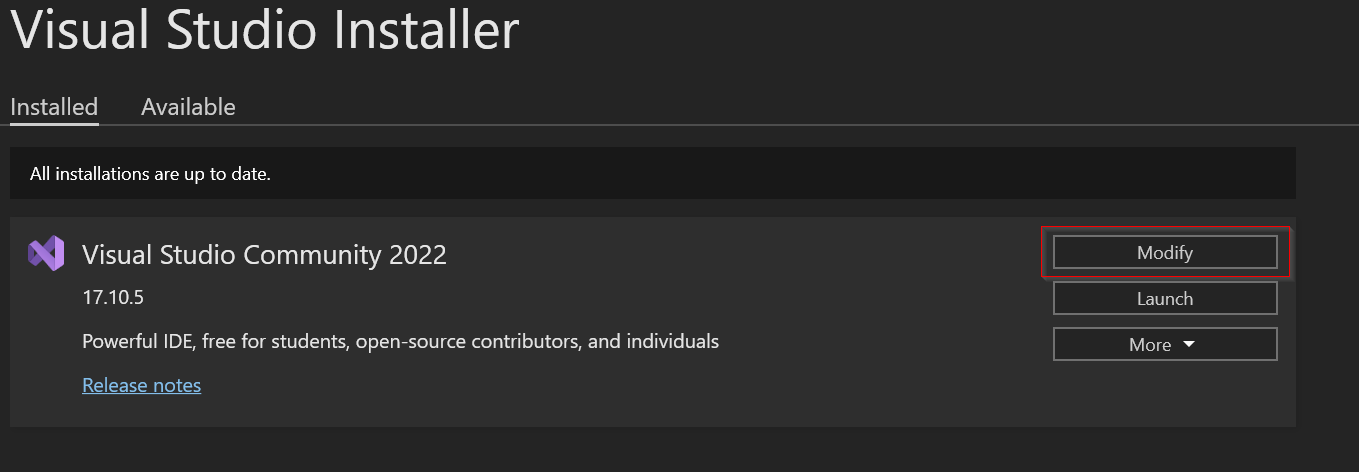
Open the Visual Studio Installer and click on "Modify".
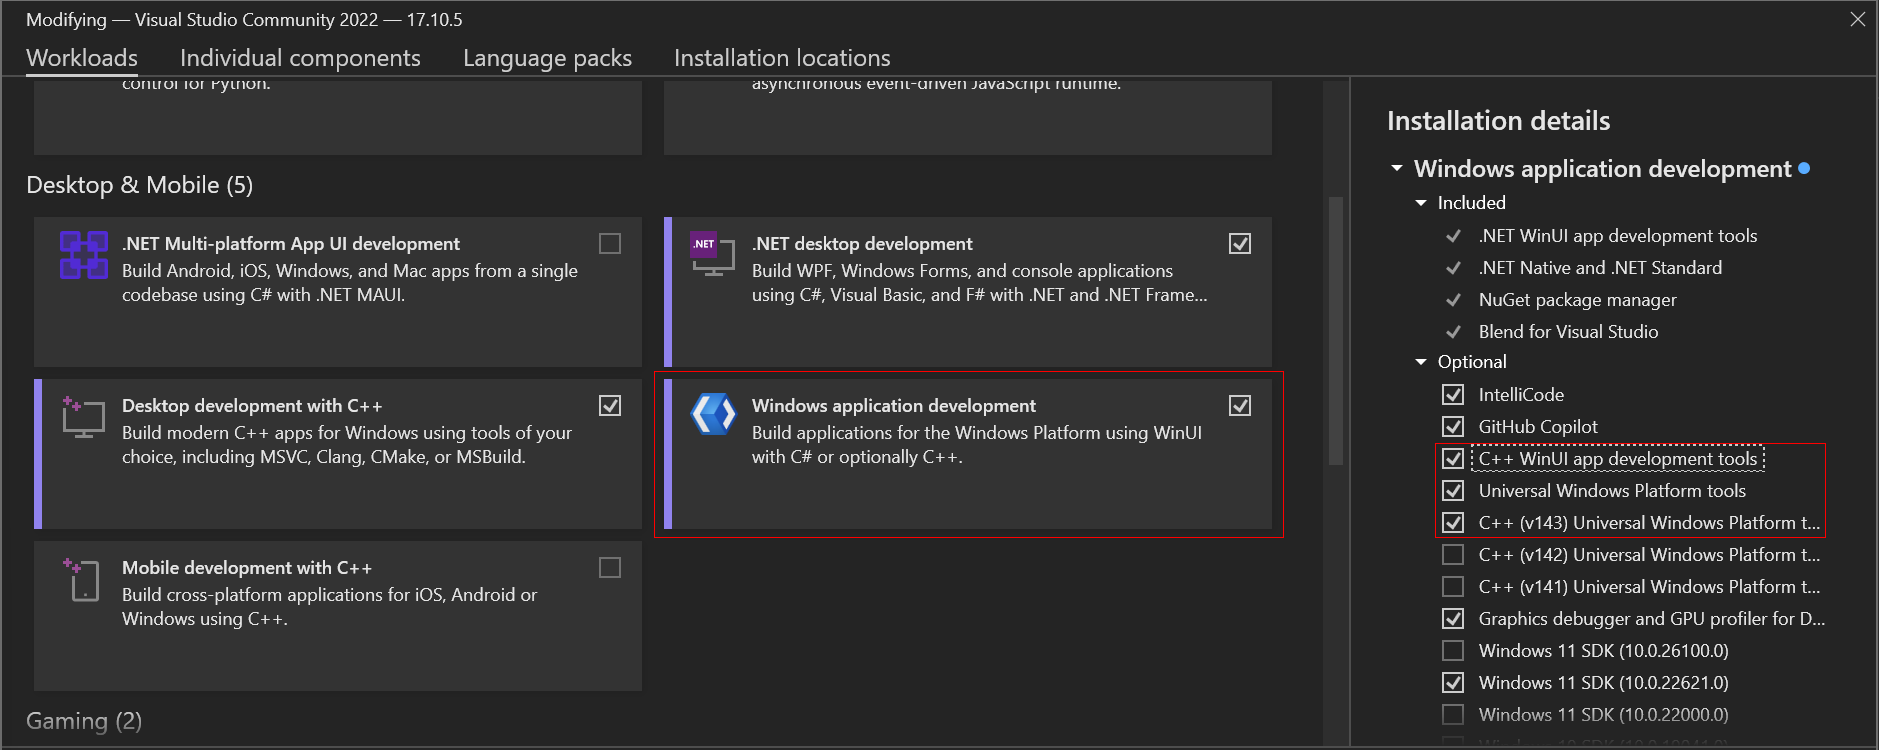
In Visual Studio 2022, "Universal Windows Platform" has been replaced by "Windows Application Development". Additionally, for developing C++ apps, we can select the relevant options on the side.
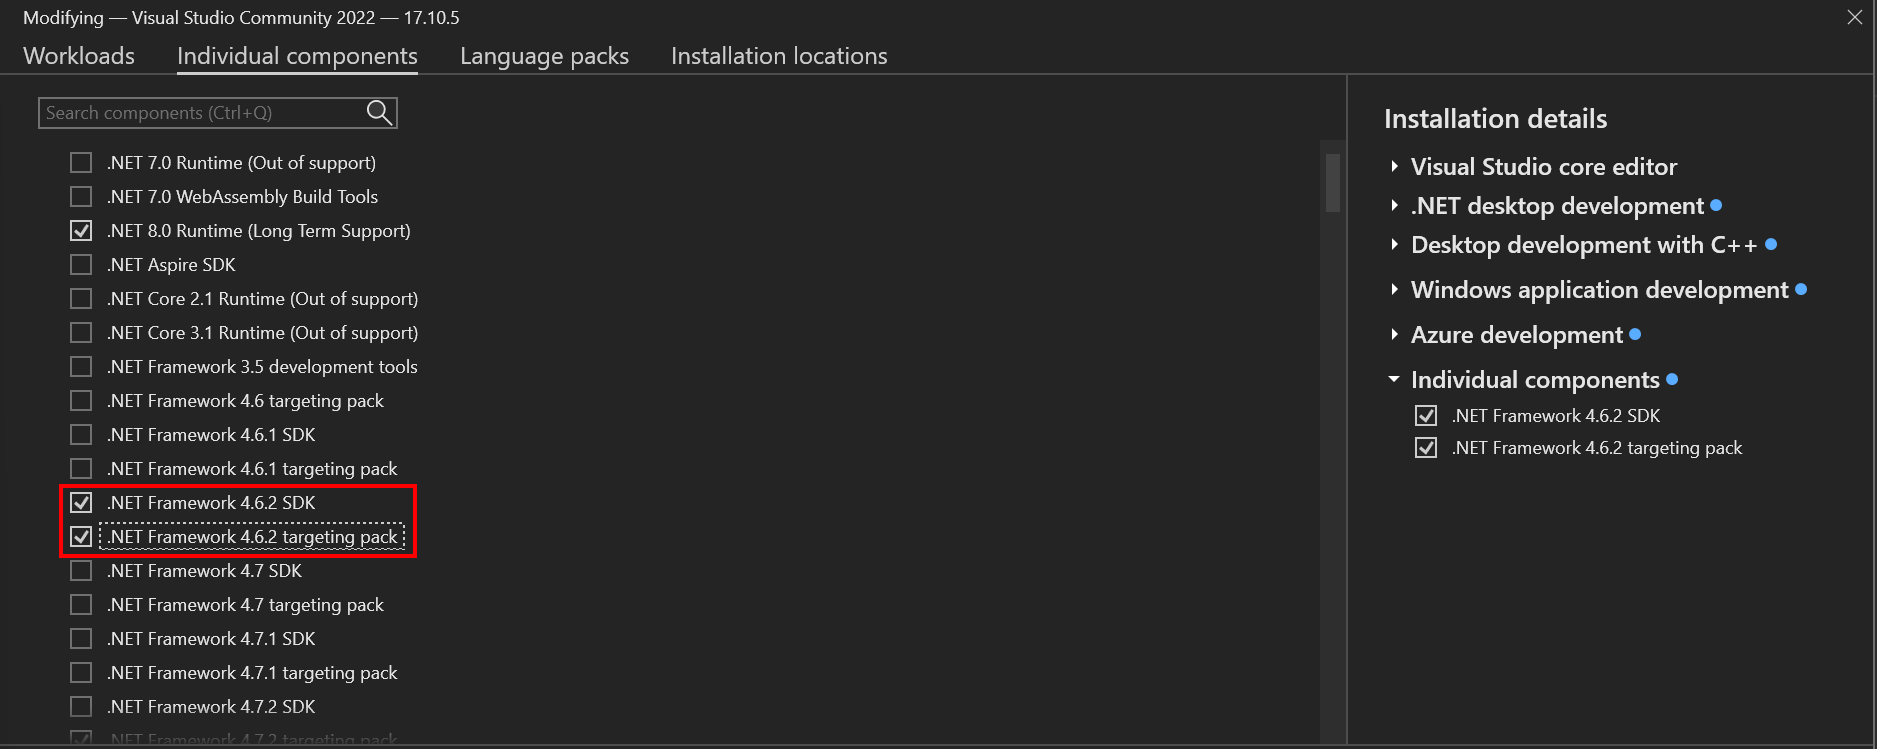
Next, click on "Individual components" and ensure the correct .NET SDK versions are selected. Then, click "Modify".
The latest version of WiX v5 requires .NET Framework 4.7.2 or higher to be installed.
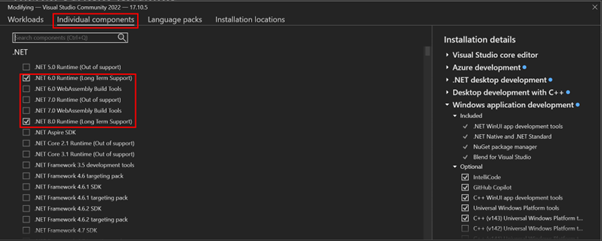
- Since WiX requires .NET SDK version 6 or later, make sure these versions are installed in the "Individual components" tab.
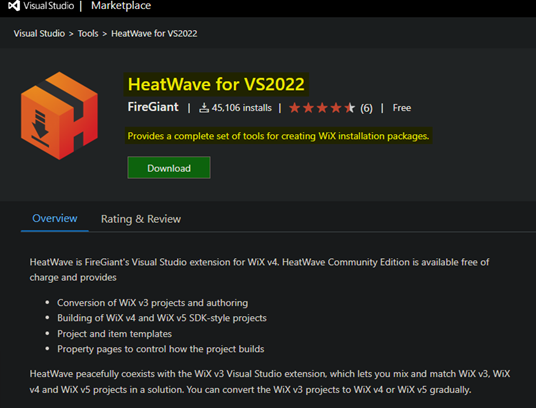
- Next, download the WiX Toolset, now renamed "Heatwave for VS2022," which supports both WiX v4 and v5 SDK-style projects. Install it, as we are using WiX v5.
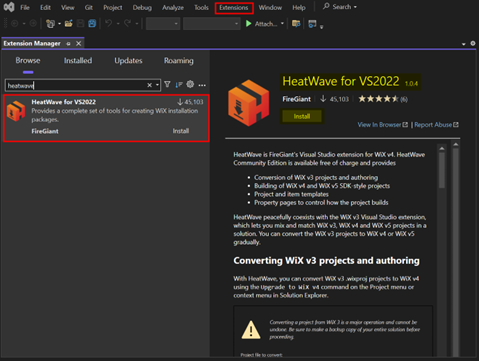
- You can also install it from within Visual Studio 2022 by going to Extensions > Manage Extensions and searching for "Heatwave”.
- Once installed, we can get started with the WiX toolset.
#Creating a C# Project
- Open Visual Studio 2022, select Create New Project, search for Windows Forms App (.NET Framework), and click Next. Name your project and ensure .NET Framework 4.7.2 or higher is selected.


A window named Form1.cs will then appear, confirming that the project has been built successfully.
#Customising the Windows Form
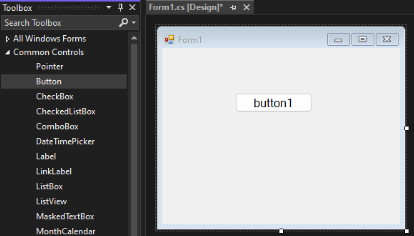
We can also customize the Windows Form to display "Hello, World." Once the WinForms designer is open, if the Toolbox isn't visible, press CTRL+ALT+X to display it. 
Go to Common Controls and select Button. Drag and drop the button onto the form.
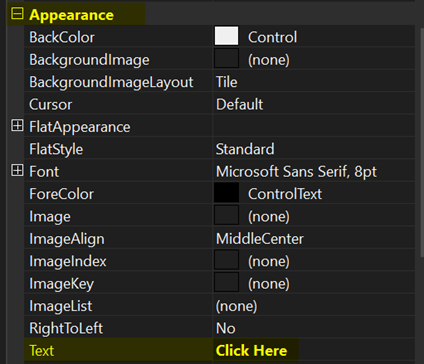
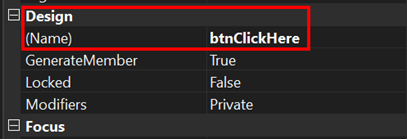
Right-click the button, select Properties, and then go to Text under Appearance to change the button's text.
Next, change the Name under the Design section to btnClickHere.
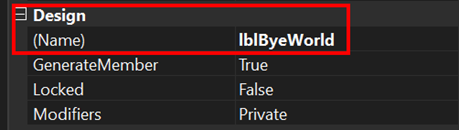
Next, add a label to the form to display text that will change when the button is pressed. Drag and drop a Label from the toolbox and name it lblByeWorld.
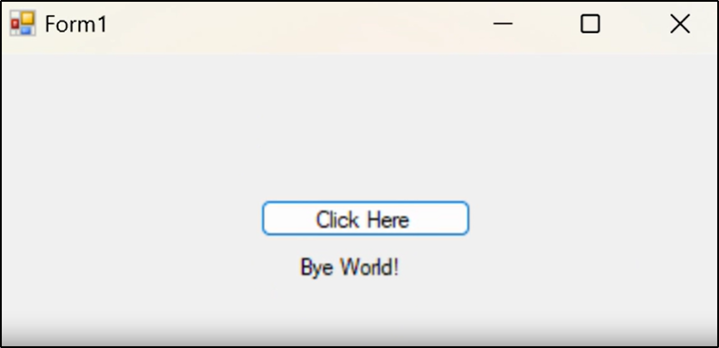
Next, double-click the Click Here button and add this code to change the label text when the button is pressed.
The code for the button is
lblByeWorld.Text = "Bye World!";
Now we can run our application, and it works.
#Creating a WiX Installer
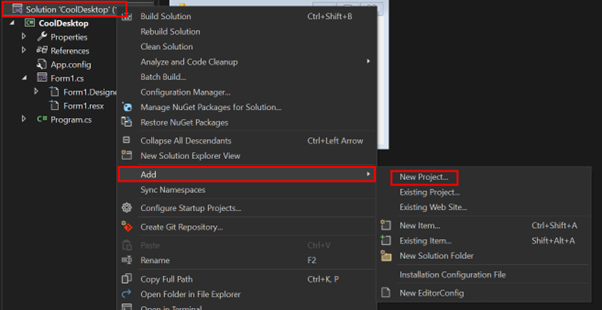
To get started, right-click the Solution tab, then select Add > New Project.

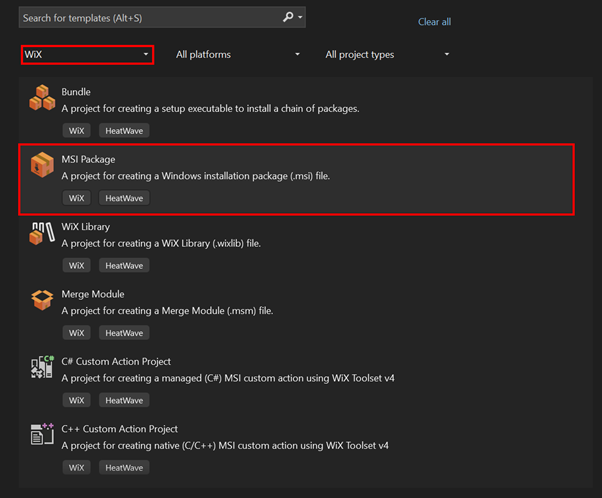
Filter by WiX, then click MSI Package.
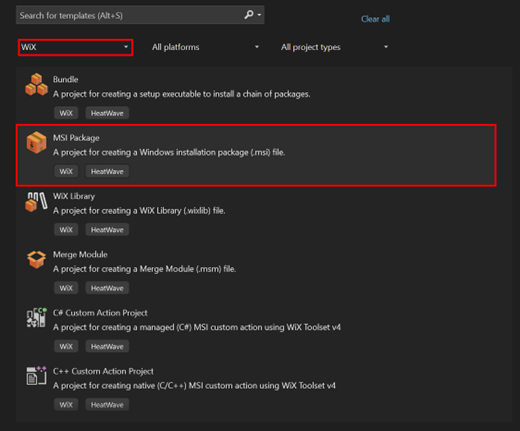
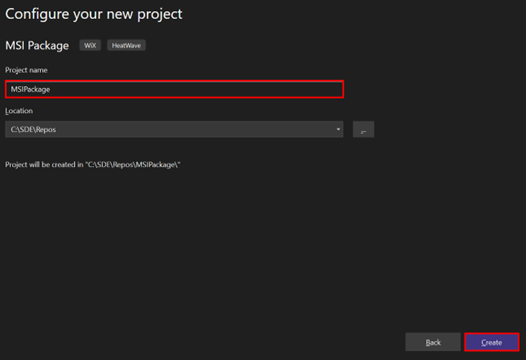
Name your package and hit create.
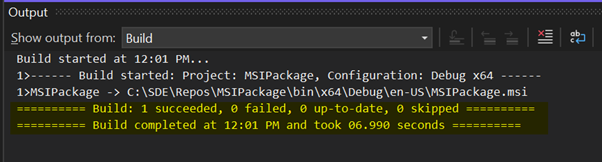
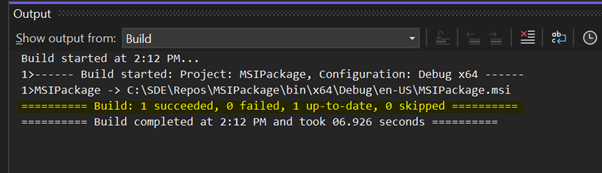
- After creating the project, it includes default files preloaded with the necessary configurations to build the MSI Package. Right-click MSIPackage and select Build. You should see a successful build message in the output box.
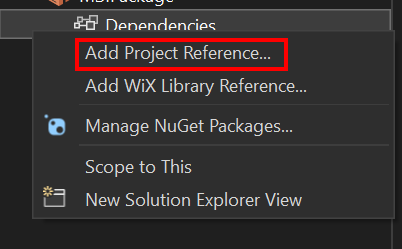
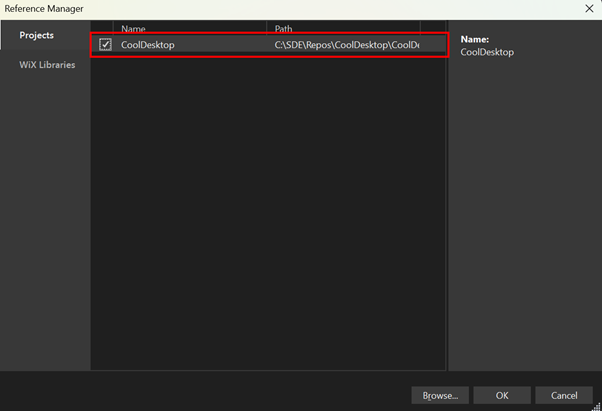
Now that it's working, let's create a reference to our Windows Form App. Right-click Dependencies, select Add Project Reference, and choose our project.
The WiX installer builds the project specified in the Source attribute. You can change the name to match projectname.exe, which is the default name generated by Visual Studio based on your project name.
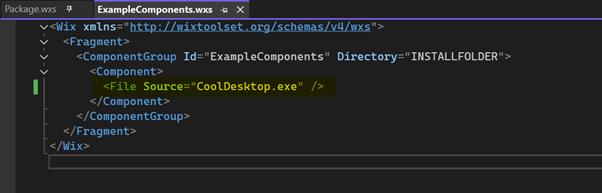
- Our build succeeded. WiX checks for our file in various directories, so you don't need to specify an absolute path. It will automatically locate the file because we added the project reference.
Finally, rename the placeholder values in package.wxs. For example, set your name as Manufacturer and leave the other values as default.
After building the package, navigate to the directory specified in the output window and install MSIPackage.msi. It will prompt for confirmation and then install the program in the Program Files directory, using the name specified in Folders.wxs. In my case, the default name is used, which includes the Manufacturer name and Package Name.

- Go to Add or Remove Programs and search for your application installed on your PC.

#Universal Application Development
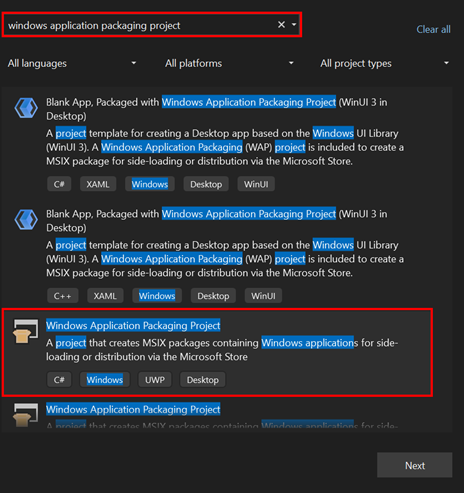
To get started, right-click the Solution tab, select Add > New Project, and choose Windows Application Packaging Project.
We can rename the project and then click create and select the default target versions.
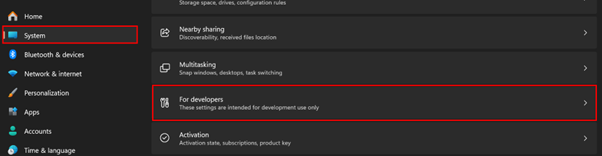
Before proceeding, enable Developer Mode in Windows 11. Go to Settings > System > For Developers and turn on Developer Mode.
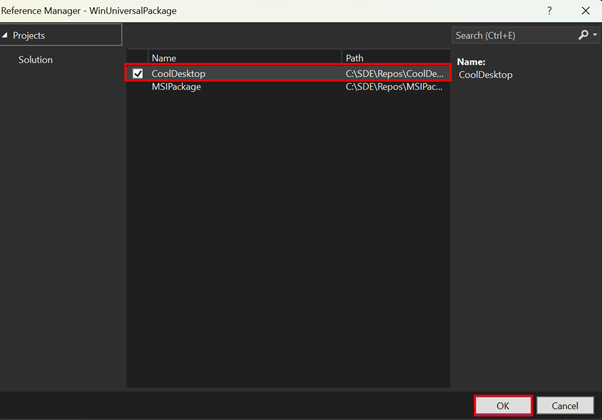
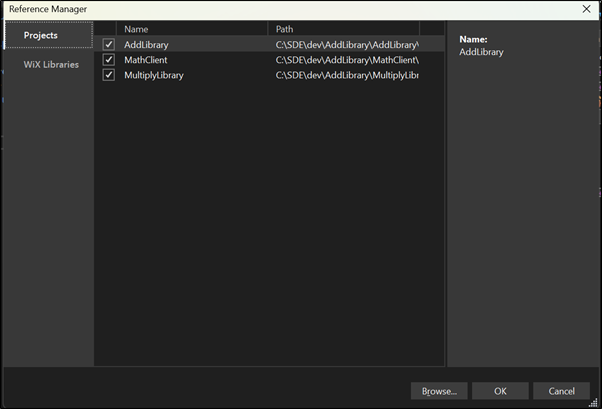
Next, add a reference to your project by right-clicking Dependencies and selecting Add Project Reference.
Tick your project application and hit OK.
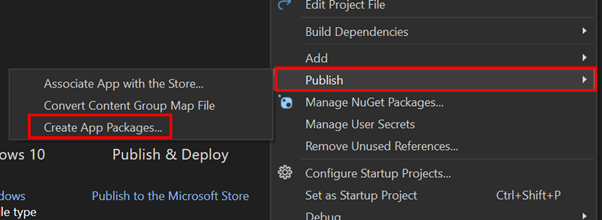
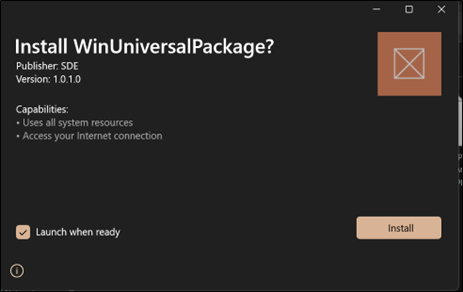
- Then, right-click the WinUniversalPackage project, select Publish, and choose Create App Packages.
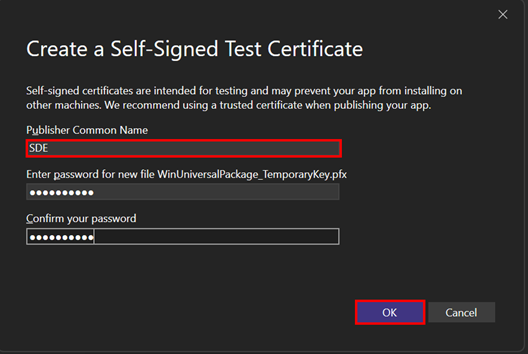
- Select Sideloading, which allows us to distribute our application outside of the Microsoft Store. Next, create a certificate to install your application by selecting Create and entering your details and password.
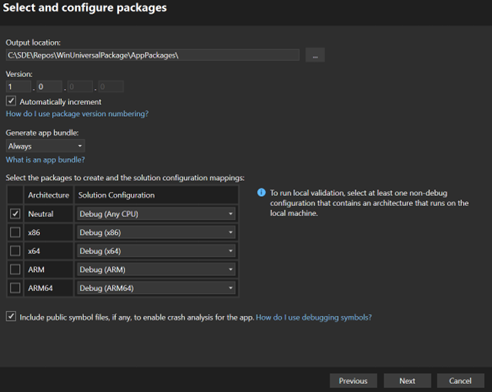
Select the version number for your package and set the architecture to Neutral to support all platforms that UWP does.
Once the build is complete, a link to the output file will be displayed. Click on it to navigate to the directory.
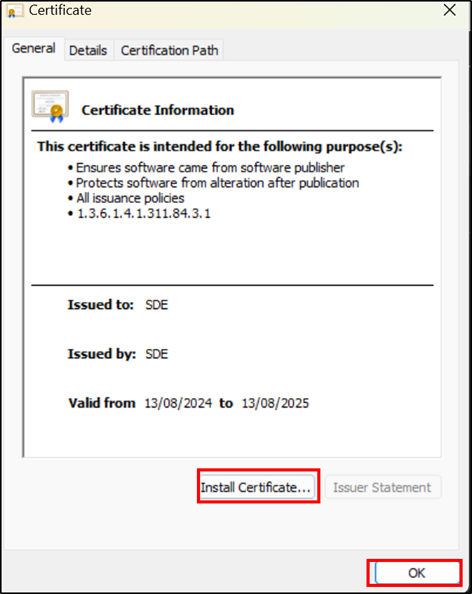
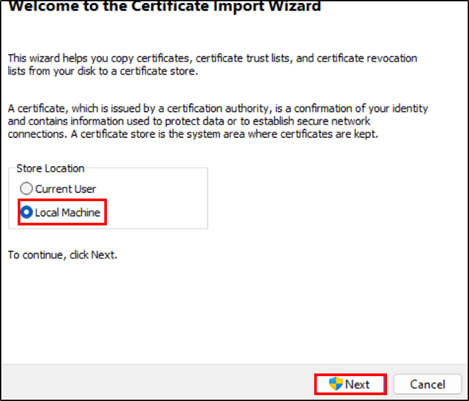
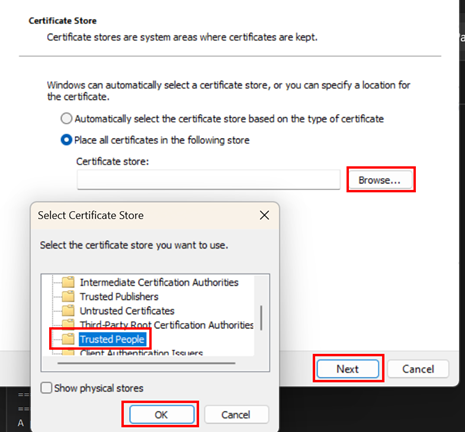
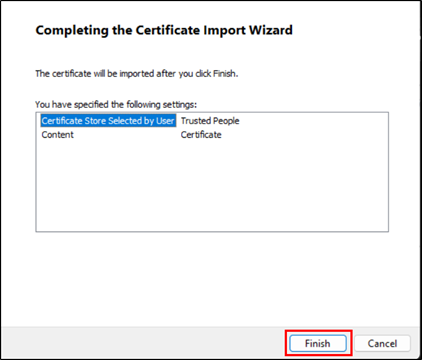
In the same directory, locate the certificate file with the
.cerextension. Click on it, then select Install Certificate. Choose Local Machine and select Place all certificates in the following store. Browse to Trusted People and click Finish. Your certificate should now be installed, allowing you to sideload your application.
- Locate the file with the
.msixbundleextension, double-click it, and follow the prompts to install it.
- Our application is successfully installed. Note: If you do not create a certificate during packaging or do not put certificate in trusted people. You will not be able to install the app.
#Deploying Application with Multiple DLLs
#Creating a DLL in C++
To create multiple DLLs in C++, start by creating a new project. Ensure that Desktop Development with C++ is installed; if not, install it using the Visual Studio Installer.
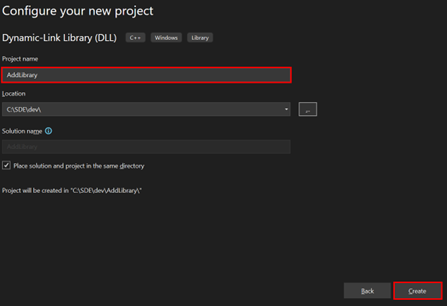
Search for DLL in the search bar, select the first option, and click Next. Then, name your DLL file.
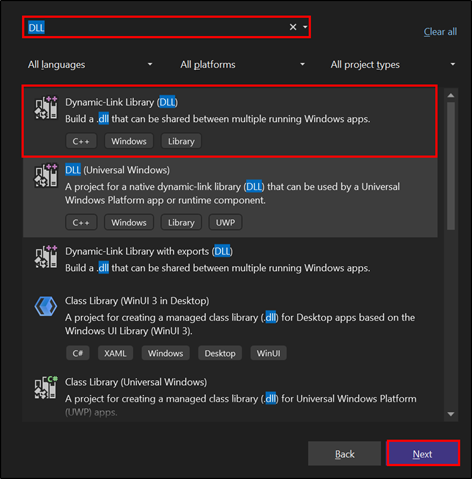
In this walkthrough, we will create two DLL libraries: one for adding numbers and another for subtracting numbers. Name the first DLL AddLibrary.
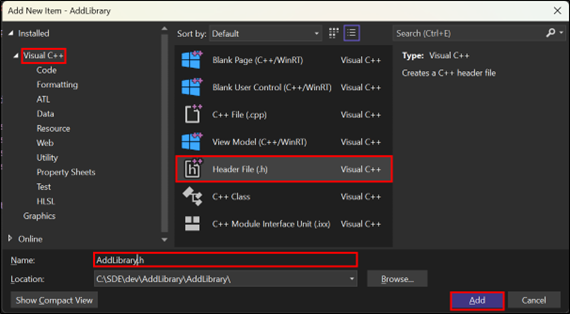
With the default files set up, add a header file by selecting Project > Add New Item. Choose Visual C++ from the More Templates section and select Header File (.h).
Add the following code to your header file. The preprocessor statements at the top are a common pattern in C++ for managing the export and import of functions and classes from a DLL. The
__declspec(dllexport)and__declspec(dllimport)directives instruct the compiler to export or import functions from the DLL, allowing the compiler to optimize the code and make DLL functions available to other applications.
// AddLibrary.h
#pragma once

#ifdef ADDLIBRARY_EXPORTS
#define ADDLIBRARY_API __declspec(dllexport)
#else
#define ADDLIBRARY_API __declspec(dllimport)
#endif

extern "C" ADDLIBRARY_API int Add(int a, int b);
- Next, add a new file named AddLibrary.cpp to define the functions declared in the header file.
// AddLibrary.cpp : Defines the exported functions for the DLL.
#include "pch.h"
#include "AddLibrary.h"

int Add(int a, int b)
{
    return a + b;
}
To verify that everything works so far, build your solution. If successful, we have created a DLL in C++. pic 42
Next, we can repeat the above steps with a new DLL project to create another DLL library called MultiplyLibrary and use the following code.
// MultiplyLibrary.h
#pragma once

#ifdef MULTIPLYIBRARY_EXPORTS
#define MULTIPLYIBRARY_API __declspec(dllexport)
#else
#define MULTIPLYIBRARY_API __declspec(dllimport)
#endif

extern "C" MULTIPLYIBRARY_API int Multiply(int a, int b);

// MultiplyLibrary.cpp : Defines the exported functions for the DLL.
#include "pch.h"
#include "MultiplyLibrary.h"

int Multiply(int a, int b)
{
    return a * b;
}
#Creating a Client App
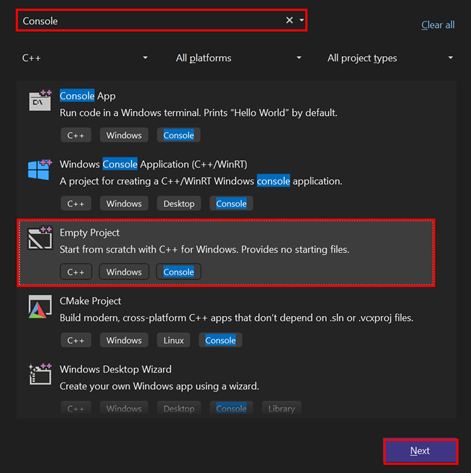
- After creating both DLLs, we can proceed to create a client application to use them. From the menu bar, select File > New > Project, then choose Empty Project from the dialog box. Create a file named MathClient.cpp.
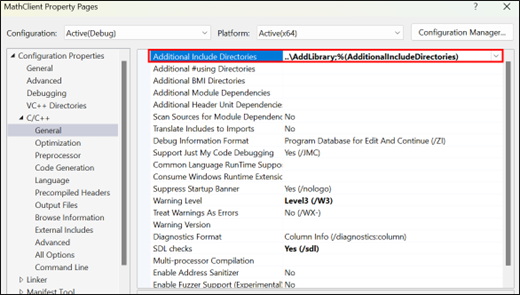
- In the Property Pages dialog box, click the down arrow next to Additional Include Directories and select Edit. Since the DLLs are in the same folder, use
..\AddLibraryto specify the paths to your libraries
- Now, we can write code in MathClient.cpp to use our libraries.
#include <iostream>
#include "AddLibrary.h"
#include "MultiplyLibrary.h"

int main()
{
    int a = 5;
    int b = 5;

    std::cout << Add(a, b) << std::endl;
    std::cout << Multiply(a, b) << std::endl;
}
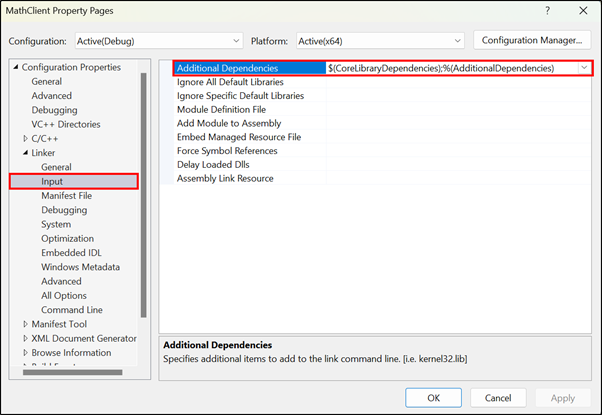
- Next, link the DLL libraries to your project by going to Properties > Linker > Input and adding AddLibrary.lib and MultiplyLibrary.lib.
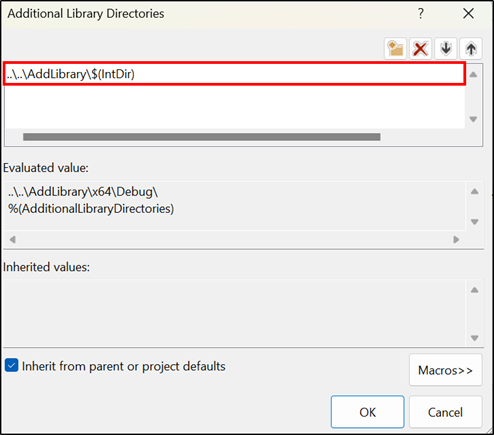
- To help our project locate the library files, go to Linker > General > Additional Library Directories and add the paths to your library files.
- After everything is set up, right-click the MathClient project and select Set as Startup Project or press
Ctrl+Shift+P. This will allow you to run your CPP file instead of the DLL files. Run the solution, and your program should work.
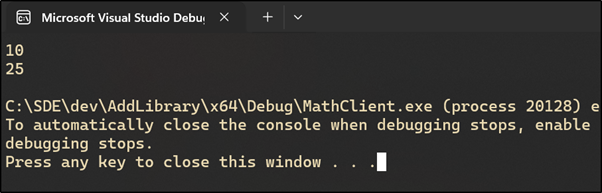
Note that the program will not work if the directory paths or dependencies are incorrect, so be very careful when setting those paths. Other than that, there should be no other errors.
#Creating a WiX Installer
- To get started, right-click the Solution tab, select Add, and then choose New Project.
- Filter by WiX, then click MSI Package.
Name your package and hit create.
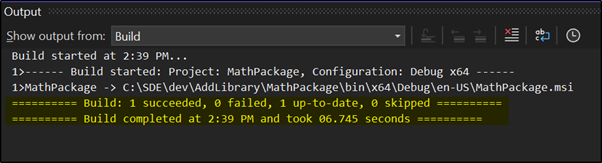
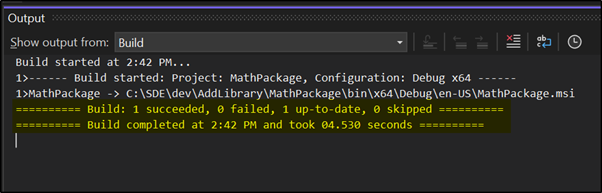
Upon creating the project, it includes default files with the necessary configurations to build the MSI Package. Right-click MathPackage and select Build. You should see a successful build message in the output box.
- Now that it's working, let's create a reference to our C++ Application with Multiple DLLs. Right-click Dependencies, select Add Project Reference, and choose your project.
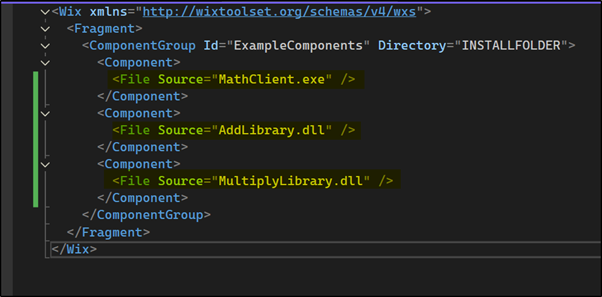
- The WiX installer builds the project specified in the Source attribute. We can change the name to match
projectname.exe, which is the default name generated by Visual Studio based on your project name. Ensure that you include all the project and DLL names you want to include in the final package.
- Our build succeeded. WiX checks for the file in various directories, so we don't need to specify an absolute path. It will automatically locate the file because we added the project reference.
Finally, rename the placeholder values in package.wxs. Set your name as Manufacturer and leave the other values as default.
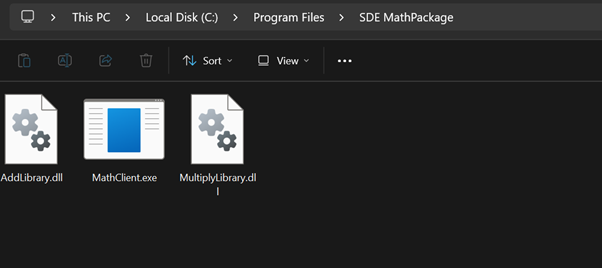
After building our package, go to the directory specified in the output window and install MathPackage.msi. It will prompt for confirmation and then install the program in the Program Files directory, using the name specified in Folders.wxs. In my case, it installs the program in the Program Files folder.
When we go to the Program Files folder, we can see both our DLL and main program files.
#Deploying our Application to Microsoft Store
#Creating a Developer Account
To start deploying our app to the Microsoft Store for public access, we first need an individual developer account in the Partner Center. Visit
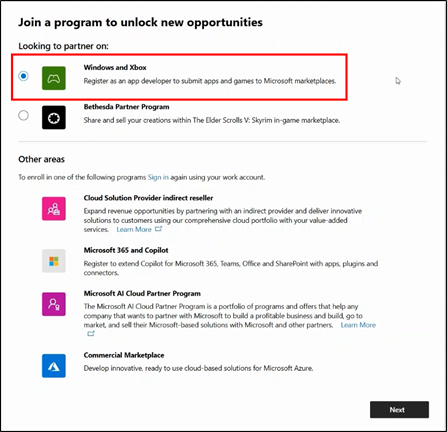
partner.microsoft.com/dashboard/registrationto get started.Next, sign in with your Microsoft account and after logging in, select the platform where you want to publish your app. To publish in the Microsoft Store, choose the first option.
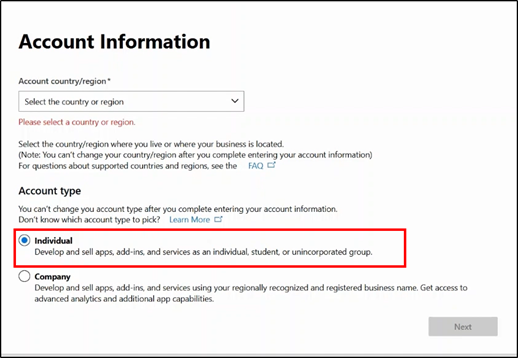
- Next, choose your region. Since this choice is permanent, select carefully. Then, choose your account type.
- After this, enter a unique Publisher Display Name and fill in the remaining details, including your address and contact information.
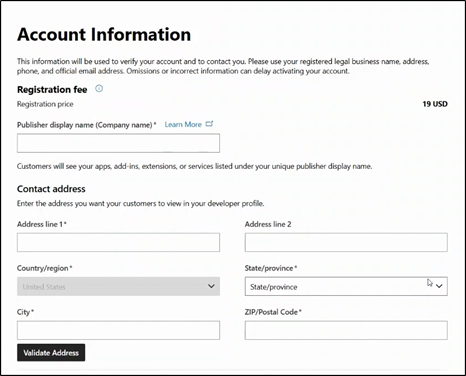
After agreeing to the terms of service, you will need to pay $19 USD for the account by entering your payment information. Since we are not proceeding with the payment, we will describe the remaining steps without pictures. After completing the payment, your account will go through verification to ensure that your publisher’s name is unique and other details are correct.
Now, we can start publishing our Windows application using the Microsoft Partner Center. To submit our app to the store, we need to package it in either MSIX, PWA, MSI, or EXE format. Microsoft recommends using MSIX for packaging, as it provides many features and benefits regardless of the app framework (UWP, Win32, PWA, etc.)
#Submitting our Application
Before publishing our app, we need to reserve a unique app name. Navigate to Microsoft Partner Center, select Apps & Games, click on New Product, and choose MSIX or PWA App.
Enter the app name in the dialog box and click Check Availability to see if the name is available. If it is, click Reserve Product Name. If the name passes the availability check but you can't reserve it, another developer may have reserved it but not yet published their app.
From the Apps & Games dashboard, click on your app name to access the product release page. Once there, click the Start Submission button, which will guide you through the steps needed to publish the app.
Next, click on the Pricing and Availability link and fill in all required information, including the base price of your application.
Next, click on the Properties page and fill in the category of your app. Provide any additional details as necessary.
Click on the Age Rating section and complete the questionnaire to receive an age rating for your application. Once done, click Continue and then Save to save your progress.
Go to the Packages page and upload your
.msixbundleand.msix.classic.appxbundlefiles to the website.Next, go to the Store Listing page, which shows how your app will appear in the Microsoft Store to potential downloaders. Fill in all the details and click Save.
Finally, the Submission Options section is optional but can be useful for sending notes for certification and timing your publication.
After completing all the steps, click Submit for Certification. The app will then go through the certification process, which can take up to 3 business days. Once certified, the app listing will appear in the Microsoft Store within 15 minutes.